

Whether you are renewing and renovating your kitchen, you have to repair your kitchen faucet or you simply bring in a replacement, a professional plumber clearly represents the best choice – easy to deal with and no effort on your side. But on another note, lots of people rely on themselves – replacing or changing faucets makes a great DIY project.
Learning how to remove Moen kitchen faucet could be a bit challenging at first. However, even if you have never done it before, the job is quite straightforward and intuitive.
While there are ways to go wrong, this tutorial will teach you how to do it in no time. You do not need any sophisticated tools, but just a few basic things you may already have around.
Table of Contents
7 Steps On How To Remove Moen Kitchen Faucet
1. Shutoff Water Supply
This is your first step in the process. If you aim to remove a faucet and the water is still on (even if the faucet is off), chances are it will spray all over. By the time you figure a way to turn it off, your kitchen may already be flooded. Most commonly, you should be able to do it from under the kitchen sink – this is not a general rule though.
No matter where the tap is, you should find two different valves. One of them is for cold water, while the other one is for hot water. Make sure you are at the point where water pipes are connected to supply tubes. Both of them must be shut off before starting the operation unless you want a disaster in your kitchen.
If you have an old house or the valves have not been operated in years, they might be frozen. At the same time, an older house may not come with such valves. It is not the end of the world though. Simply locate the main valve close to the water meter. Ideally, you should get some shutoff valves before installing a new faucet.
2. Double Check EverythingLearning how to remove the Moen kitchen faucet implies a few checks upfront. Once the valves are shut, make sure there is no water coming out. Turn the hot water on. Is there anything coming out? Do the same for the cold water? In an ideal case, there should be no water coming out of the faucet. If there is, valves may not work properly.
3. Place The Bucket In The Right PlaceThis is when the bucket comes in handy. If you have not used the faucet in a long time, it might be useless. However, given the potential mess you may end up with, it is safer to just use it. Place it under the shutoff valves. There might be some residual water in the supply tubes. It will come out as you remove them, so the bucket will catch the water.
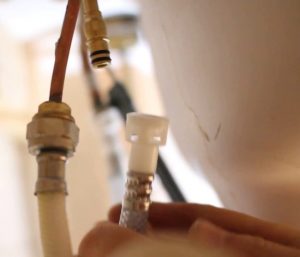
4. Disconnect The Supply Tubes
Disconnect the supply tubes for both the hot and cold water. You should do it one at a time. The disconnection should be done where they connect to the tailpipes of your faucet. If they are slightly stuck, you will notice the shutoff valves will also move. You can hold each shutoff valve in place with a set of pliers or a wrench.
Take a look at the supply tubes too. Do they look ancient? Do they seem worn? Are they done? If they are not in the best condition, you might as well replace them too before installing the new faucet. It will save you some trouble later on.
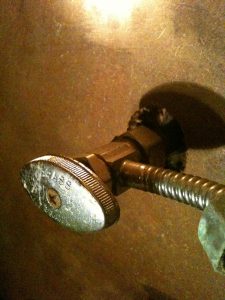
5. Remove the nutsThe faucet is mounted and secured with some nuts. Learning how to remove the Moen kitchen faucet starts with these nuts. They go into the tailpiece, but they are also under the sink. They should be behind the basin.
Moen has a plethora of different kitchen faucets, so there are a few different styles and designs out there. For example, some faucets come with a single nut, while others feature two of them. Reaching the nuts can be a bit tricky, as they are often hidden between the wall and the back of your sink. This is when the basin wrench kicks in.
This tool is specifically built for such applications, hence the name. Turn the nuts counterclockwise. If the job seems impossible or you feel like you are about to break them, simply spray some penetrating oil on the first, let it there for 10 minutes and try again.
6. Take the faucet outOnce the nuts are out, removing the faucet should be a matter of seconds only. You can start wiggling it but do it gently to avoid damaging the sink. Wiggle it from above the sink while gently pulling up. Eventually, you will be able to take it out.
If you have not changed the faucet in years, the seal might be a bit hardened against the sink. You might need a bit of work there, especially if everything else is loose. You can also use a plastic device to remove it gently, such as a card.
7. Clean the areaWhether you want to fix something in your current faucet, you have to clean it or you simply install a new faucet, a bit of maintenance in the area will make your job easier. At the end of the day, there are areas that you will never have access to – unless the faucet is out.
Clean the surface on your sink where the previous faucet was fitted. You may find a bit of caulking or perhaps some putty. A soft scouring pad is ideal, as it can clear the dirt without scratching your sink. If you are about to install a new Moen faucet, let the area dry before putting it in.
How to install a new faucetInstalling a new faucet is relatively simple. If you know how to remove the Moen kitchen faucet, you also know how to install a new one. Simply perform the same steps in reverse order. When getting a new faucet, make sure it features the same mechanism and installation principles. It should match your sink.
Just like you have probably guessed already, the faucet will go in with no problems whatsoever, but fitting the nuts in will be the most challenging job. A Short video: |
When To Remove Your Moen Kitchen Faucet
There are more situations when you might need to remove your faucet. Once you learn how to remove the Moen kitchen faucets, it will become a routine and you will always be able to replace your own faucets.
It is worth noting that regular maintenance does not involve removing the faucet. Sure, you cannot access the area where the faucet sits on the sink, but taking it out too many times can cause parts to get loose, causing even more trouble in the long run.
Most people see themselves forced to learn how to remove the Moen kitchen faucet when they have to replace it. Whether you get an upgrade, a new Moen faucet, or a completely different unit, make sure its installation will work with the design of your sink. The replacement is fairly simple and should take less than an hour for someone with no experience at all.
Other than that, there might be parts that give up on you. Despite the high-quality standards, Moen faucets come with, some parts could still fail. Repairing or replacing such parts will usually involve learning how to replace a Moen faucet.
Things You Need
There are a few things you will need to get this job done. First of all, get a bucket. You may not always need it, but it is handy to have it around. Second, you will need an adjustable wrench.
You might as well rely on channel-type pliers for this job. Most DIY enthusiasts have such tools around their households, so you may not have to buy them separately.
Other than that, a basin wrench is just as important. While not always needed, penetrating oil spray could help in the process. Whether you rely on WD 40 or something else, this spray will come in handy if the faucet has been installed years ago. Some of the parts might have become stiff, hence the necessity of this spray.
Conclusion
As a short final conclusion, you do not have to be a genius to learn how to remove the Moen kitchen faucet. In fact, it makes an excellent DIY project. Most people choose to change their own faucets because the procedure is quick and they will actually save some money. In fact, if you get a new faucet in, there are times when plumbing services will cost more than the actual faucet.
Removing a Moen faucet is not that difficult. Sure, these products are more qualitative than others, so they demand a bit of extra care and work. Operating principles are pretty much the same though. If you have removed a faucet before, chances are you will not struggle too much with your Moen faucet either.
If you enjoy reading this, do find out why are faucets so expensive.